How it all began…
It all started when I once bought a Mercedes Sprinter without an engine.
I didn’t want to install the original OM651. I already knew that people often put OM612 or OM613 engines (2.7 CDI, 3.2 CDI) into Sprinters. I wanted an automatic transmission, but the 5-speed that comes with the OM612/613 didn’t suit me — they’re only really comfortable at around 90–100 km/h (even with a 51:13 rear axle). Above that, the engine revs go over 2600, and it’s no longer comfortable — though those gearboxes are very reliable.
I found someone who had already installed a 7G-Tronic automatic. I bought a firmware and some advice from him — it was expensive, but good things rarely come cheap. I also bought an adapter plate. With delivery, it cost me €270. I installed everything, assembled it, flashed it, programmed it, and fired it up. Everything worked perfectly. The engine had more than enough power. The 7G-Tronic auto ran flawlessly, the cabin was quiet — it was just a joy to drive.
I drove the van for about a year and then sold it. While it was up for sale, someone noticed I had done a swap and wanted the same setup. I never thought I’d get into doing swaps, but hey — the guy wanted it…
That was my first client with a Sprinter 319 CDI. The van was delivered, and the process began.
To connect the engine and transmission, you need an adapter plate. I searched online and found one for €100. Bought it. (I had other projects in mind, so I bought three of them, just in case.)
But when it came time to test-fit it — I realized it was useless. (Even though the seller claimed “everyone uses it.”)
It had no dowels for aligning with the engine, and none for the gearbox either. Naturally, returning it wasn’t an option...
With the help of some welding and a few curse words, I managed to fit one of the plates.
The whole fitting process took nearly a day. Unfortunately, I don’t have any photos of it.
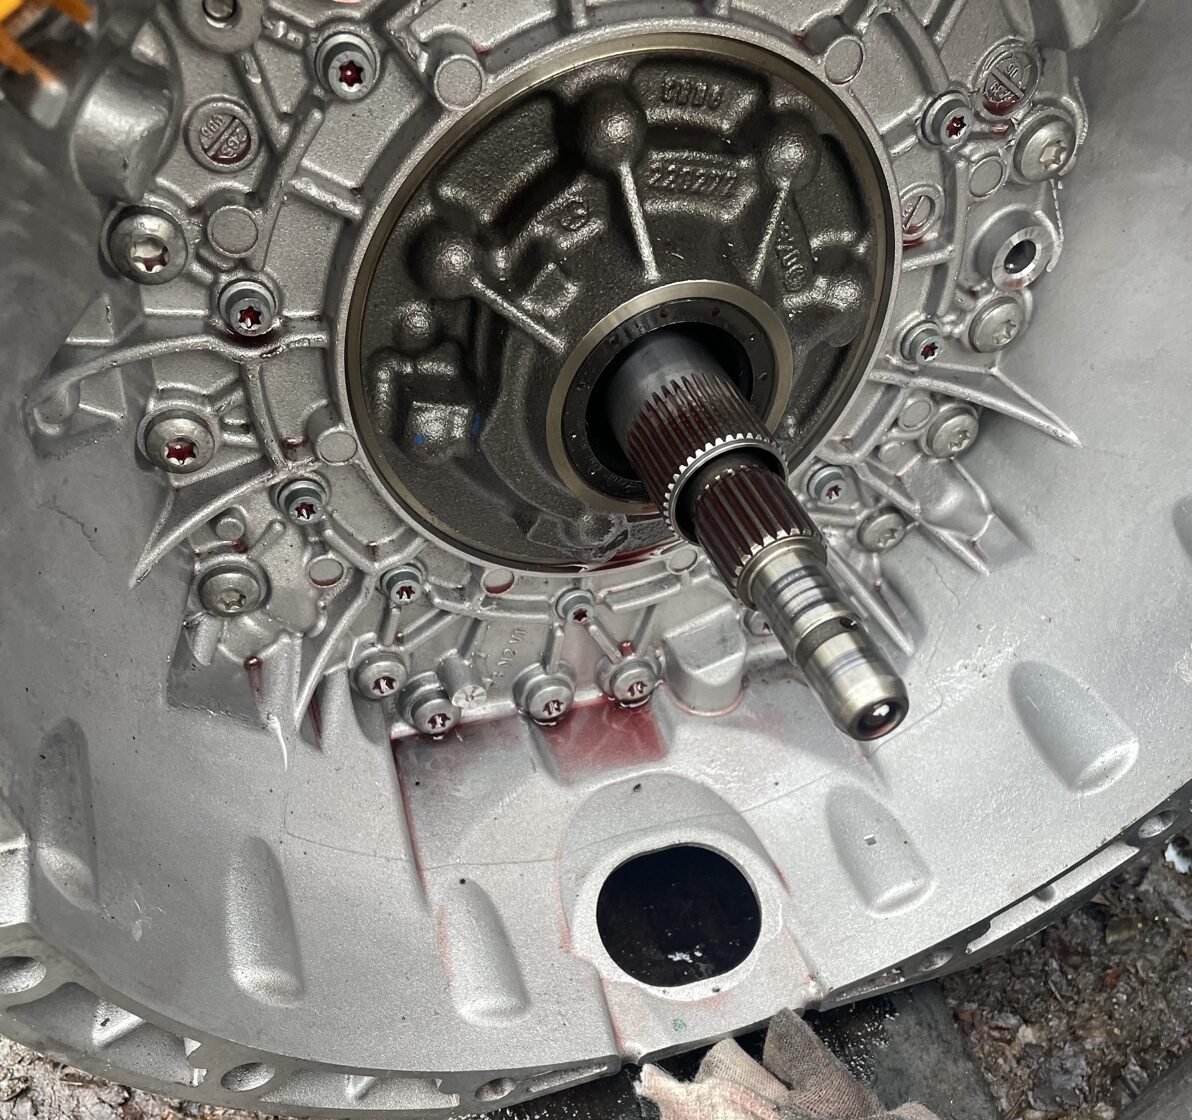
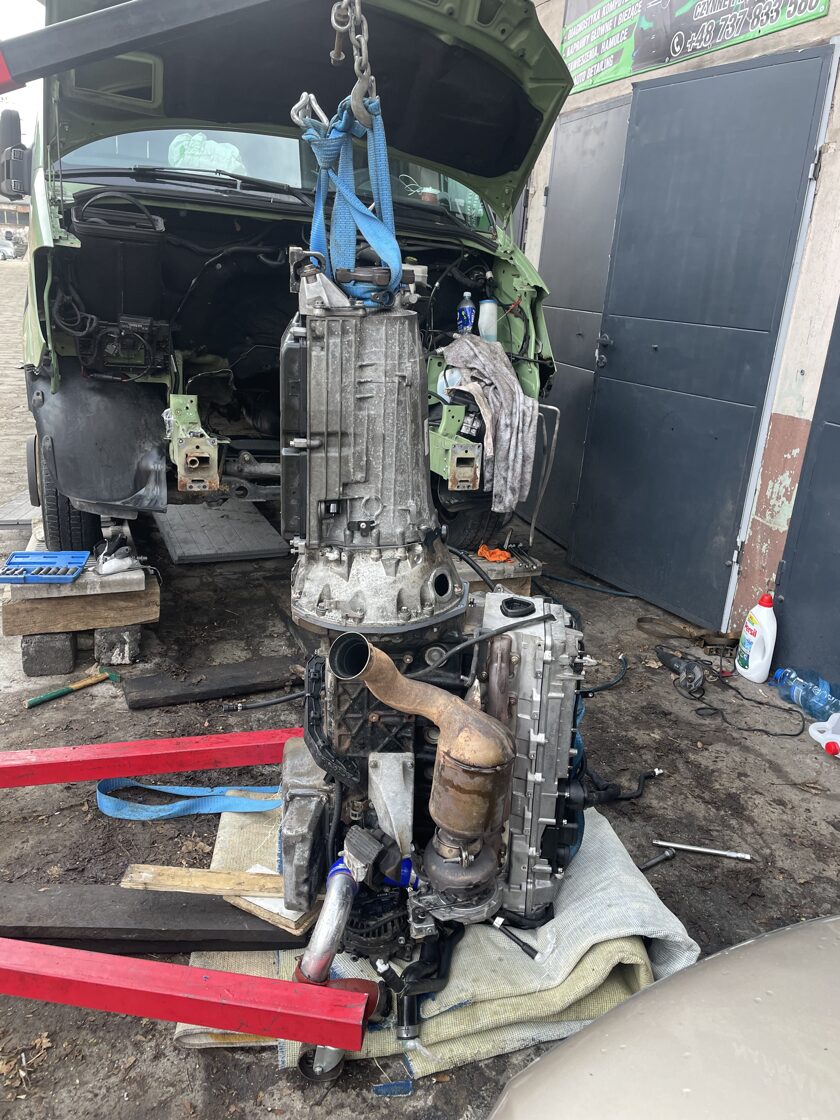
 This is the engine and transmission already installed in the van.
Some time later, a friend of mine also wanted a 648+7G swap. And the first thing you need for that is an adapter.
I couldn’t find any decent options, so I decided to make the adapter plate myself.
I borrowed a caliper and an angle finder from a friend, machined plugs for the threaded holes and the crankshaft, and started taking measurements and drafting a design.
After some tweaking and three attempts, I finally came up with something that actually resembled an adapter plate.
 The first custom-made adapter plate of my own design.
Everything fits beautifully, and every bolt screws in effortlessly — no adjustments needed. When installing, it's important to align the crankshaft properly. I assembled the swap for my friend using my own adapter plate, but there was one issue: there were no dowels for the gearbox. So far, everything’s been fine. He’s been driving it for two years and has covered over 150,000 kilometers with no problems.
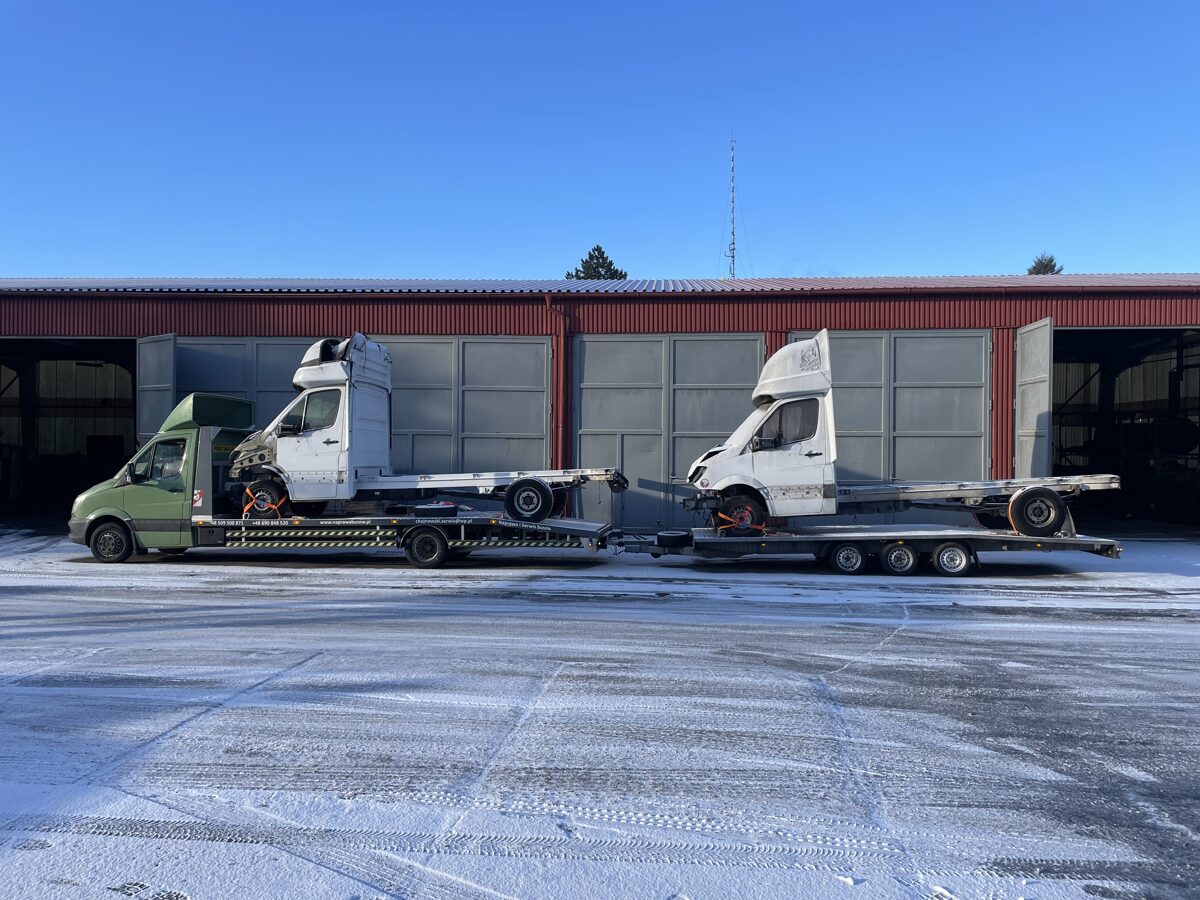
I bought myself a tow truck, "pomoc drogowa." The van had over 500,000 km on it, with an OM651 engine and a 7G-Tronic automatic transmission. I decided that while the engine was still running, it was better to sell it. I wanted to install an OM648 with a 7G transmission for myself. I assembled everything on my own adapter plate, but this time I added dowels, then headed to the Czech Republic to pick up two more Sprinters. I loaded them up and began the return journey.
The van doesn’t feel much of the load, but it really catches the wind with a load like mine. With a headwind, the fuel consumption was around 20 liters per 100 km through the mountains. If I drove at 60-70 km/h, it was noticeably less.

As soon as I entered Poland, I set the cruise control at 90 km/h. Whether going uphill or downhill, the van maintained speed, only occasionally shifting to a lower gear (5th or 6th). The engine temperature rose to about 105°C on the inclines. I drove like this for 500 km, and with less than 100 km left to Wrocław, I suddenly noticed the engine RPMs fluctuating while overtaking a truck. The revs dropped from 2000 to 1200 and then stabilized again.
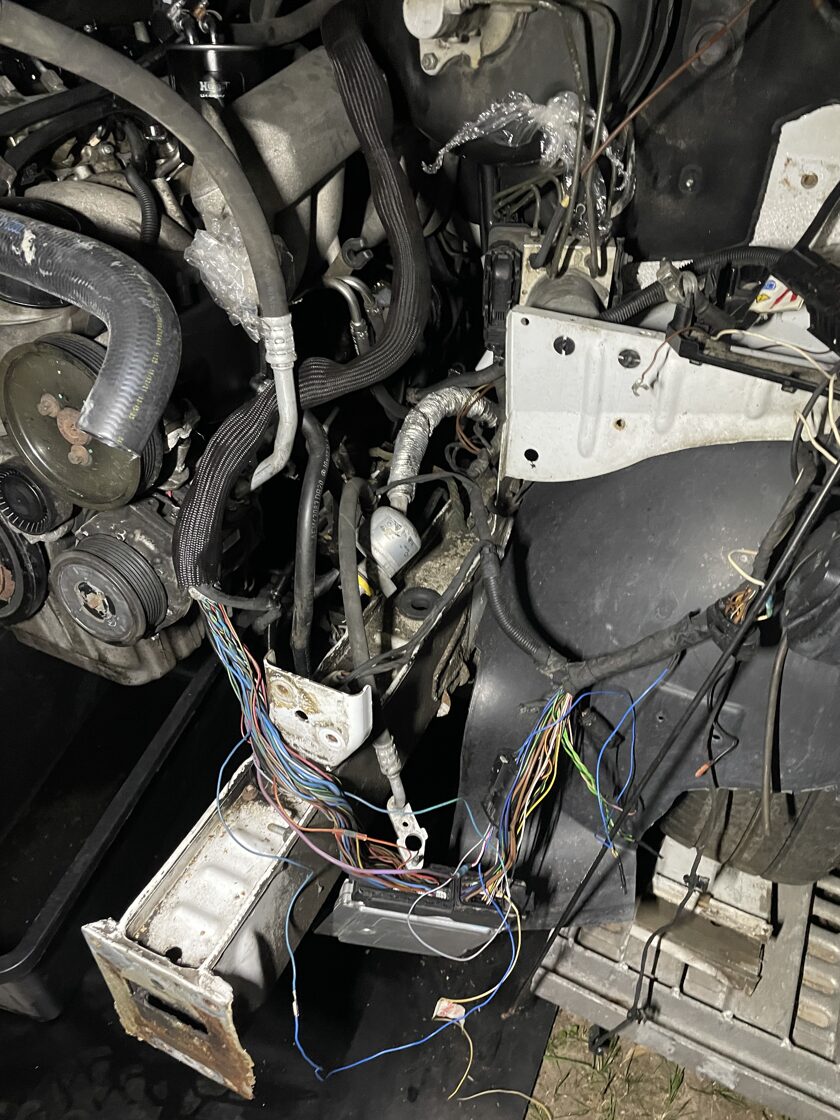
I pulled off at the nearest exit, connected the diagnostic tool, and found errors related to the gearbox: "Invalid gear or the transmission is slipping." The transmission oil temperature was 114°C. I opened the hood — everything seemed fine, but I could smell the transmission oil. I checked the hoses to the radiator — everything was dry. When I looked under the van, I saw oil dripping from the joint between the engine and transmission.
I managed to drive a couple of kilometers to the nearest parking area and waited for friends to pick me up. The next morning, I started looking for a way to get my van to Wrocław to my friend’s workshop. Finding a van with a tow bar wasn’t easy. I called around to check how much it would cost to transport the van and two other vehicles from the highway (60 km) to Wrocław: the average price was 2000 PLN (€480).
By evening, I found transport. I was waiting for the morning to figure out what had happened. Although I was already 90% sure about the cause, I still hoped that I wouldn’t have to replace the gearbox and that only the seal would need fixing.

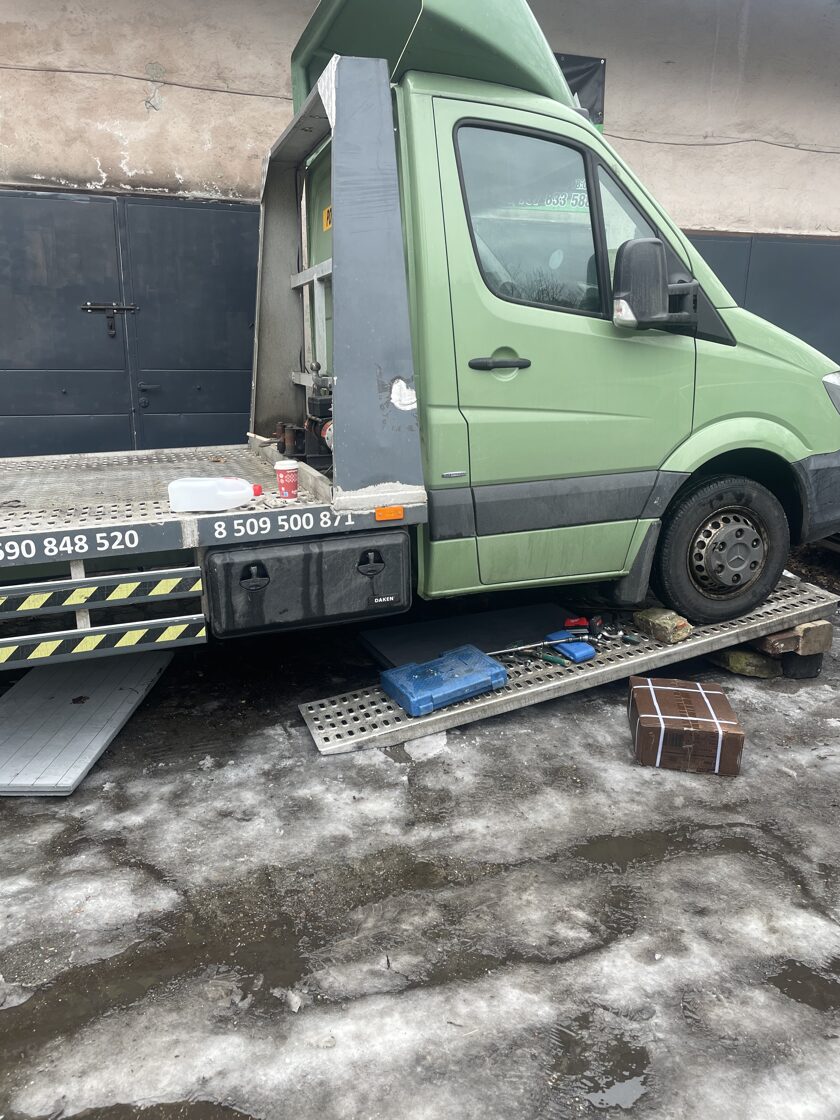
The morning came. As expected, the van didn’t fit into the service, so I had to fix it right by the gate.
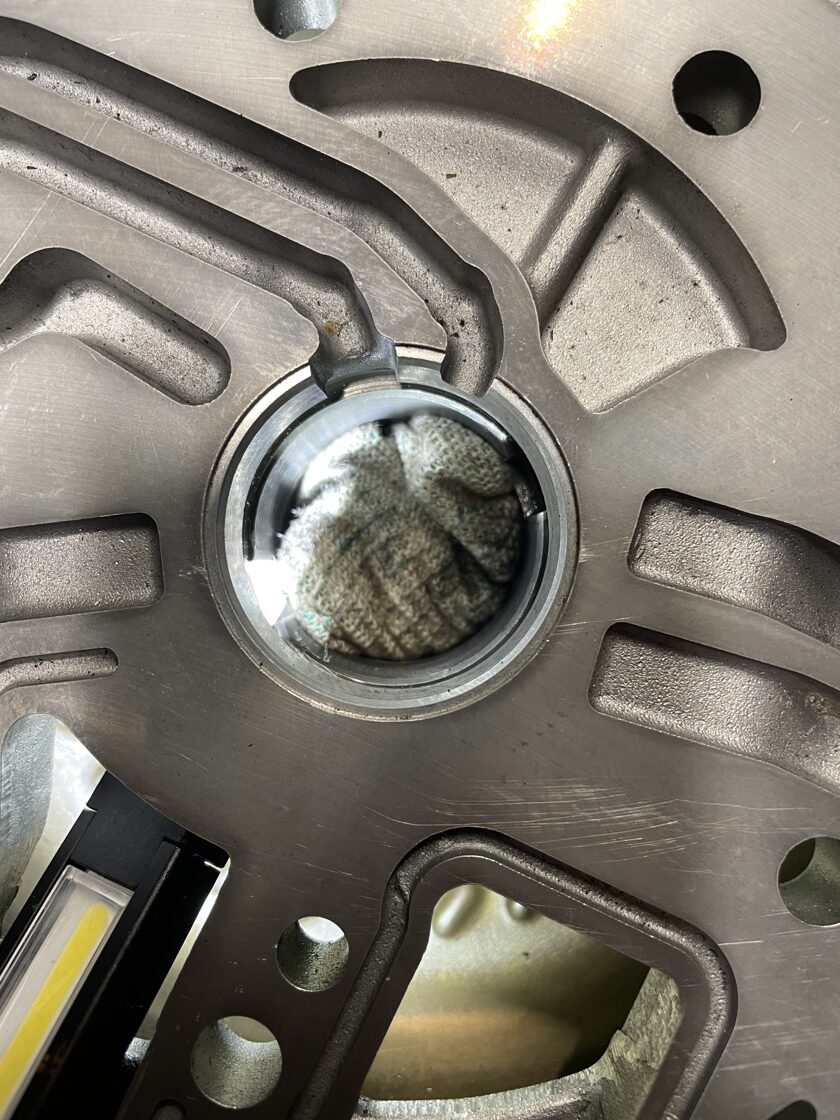
After removing the transmission and pulling the torque converter towards me, I felt that it was catching on something. Pulling harder, it finally came off. And on the hub of the torque converter, I found a seized, spun hub of the transmission oil pump.
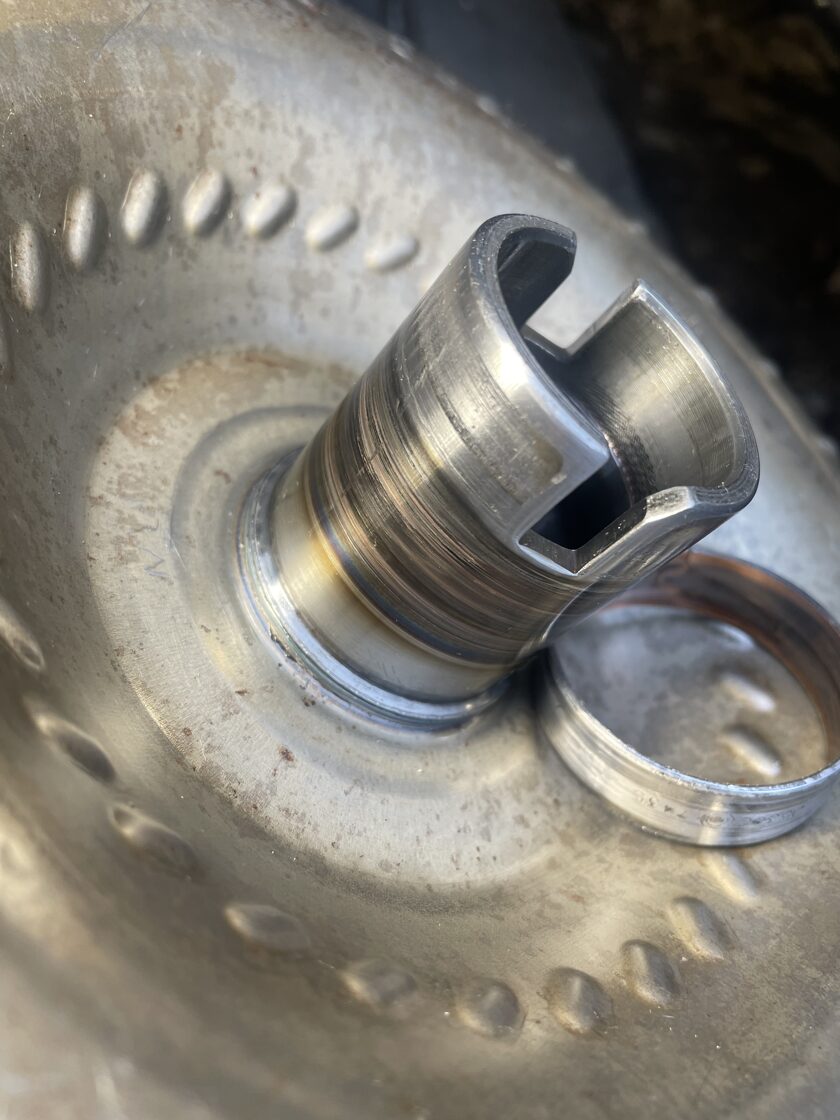
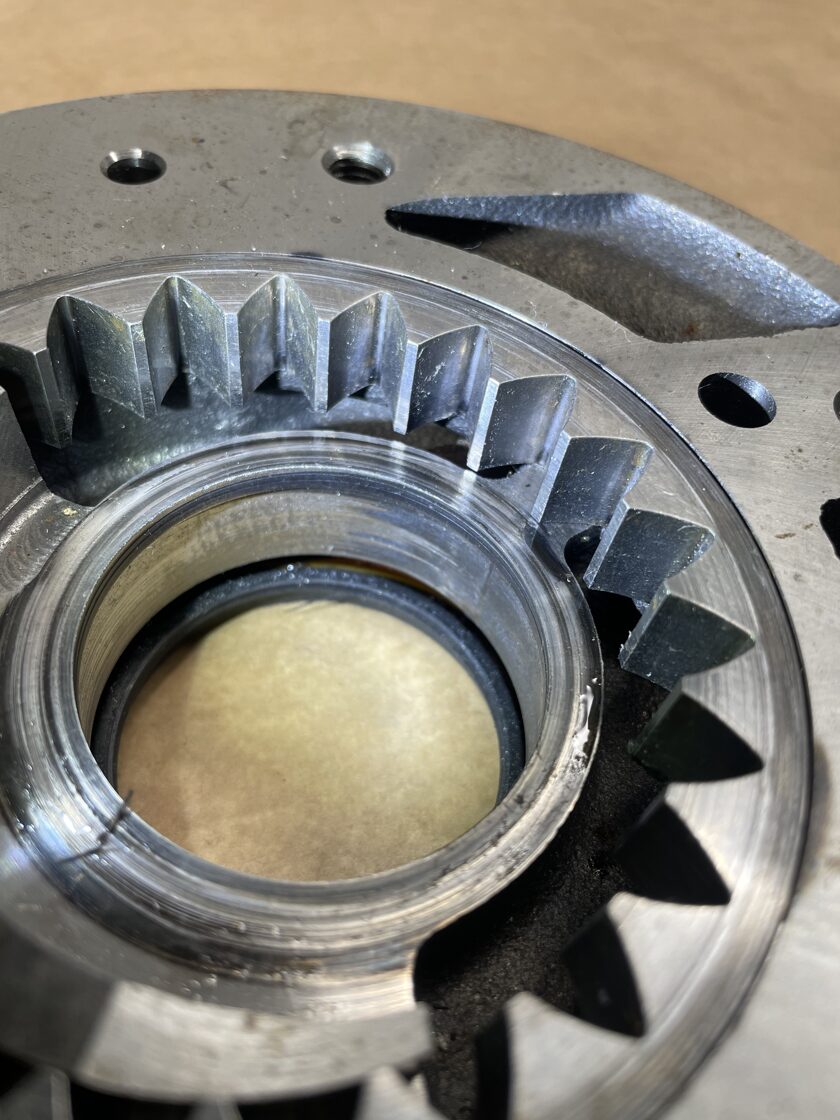

My fears were confirmed.
In the photo, you can see that the transmission was misaligned with the engine! Later, after re-measuring everything with a claimed accuracy of 0.01mm, I checked the drawings, and the transmission axis was 1.3mm lower than the engine axis. That’s according to the drawing! The maximum tolerance is 0.3mm, but usually, I find it to be between 0.1 and 0.2mm. Just imagine…
I had to search for a new transmission, plus oil, gaskets, and a filter. I also ordered a new transmission oil cooler radiator.
That’s how I discovered that the adapter plate wasn’t accurate enough. I drove around 2000 km on it from installation to failure. Now, I needed to install the transmission without dowels and try to align the axis of the transmission shaft with the crankshaft as precisely as possible. To do this, I decided to remove the engine and position it vertically for centering, so that gravity would only pull it downward.
After this incident, I decided to take measurements more seriously. During the process, I found differences between the OM613 and OM648 engines. The difference was 0.136mm. (Yes, yes, these are the "same engines," and it later turned out that each one also needs its own specific adapter plate.)
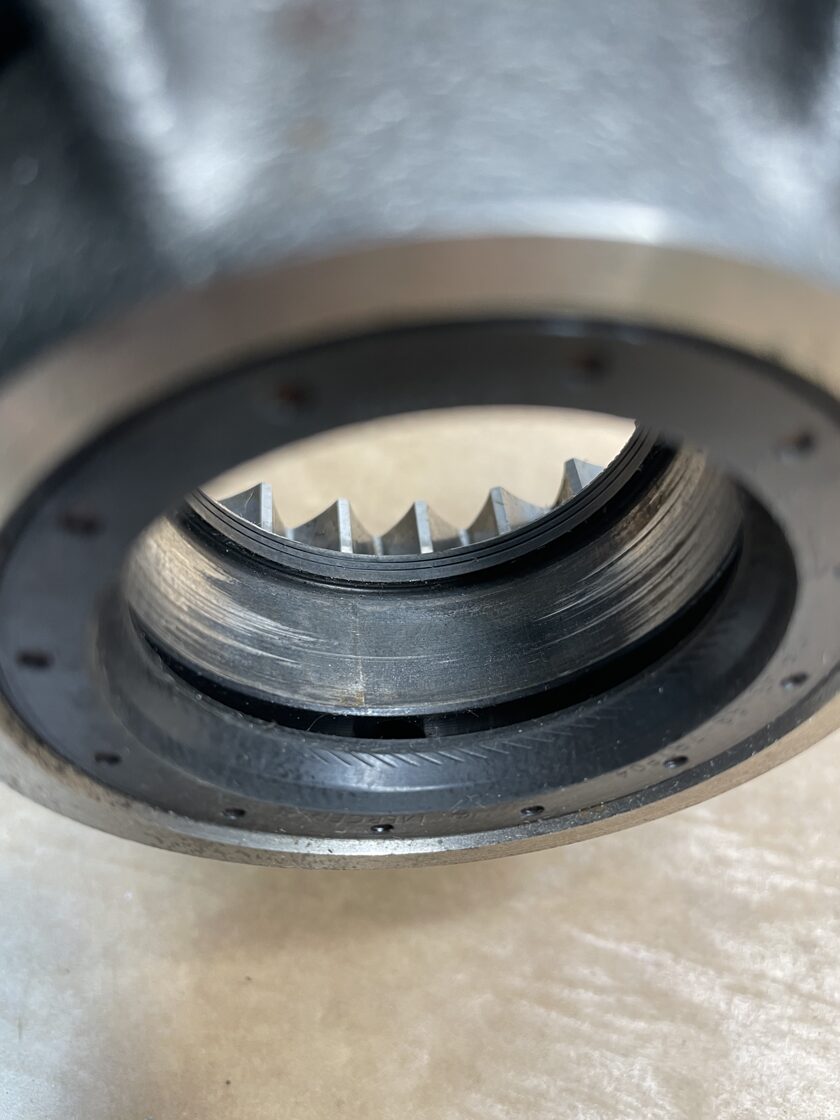
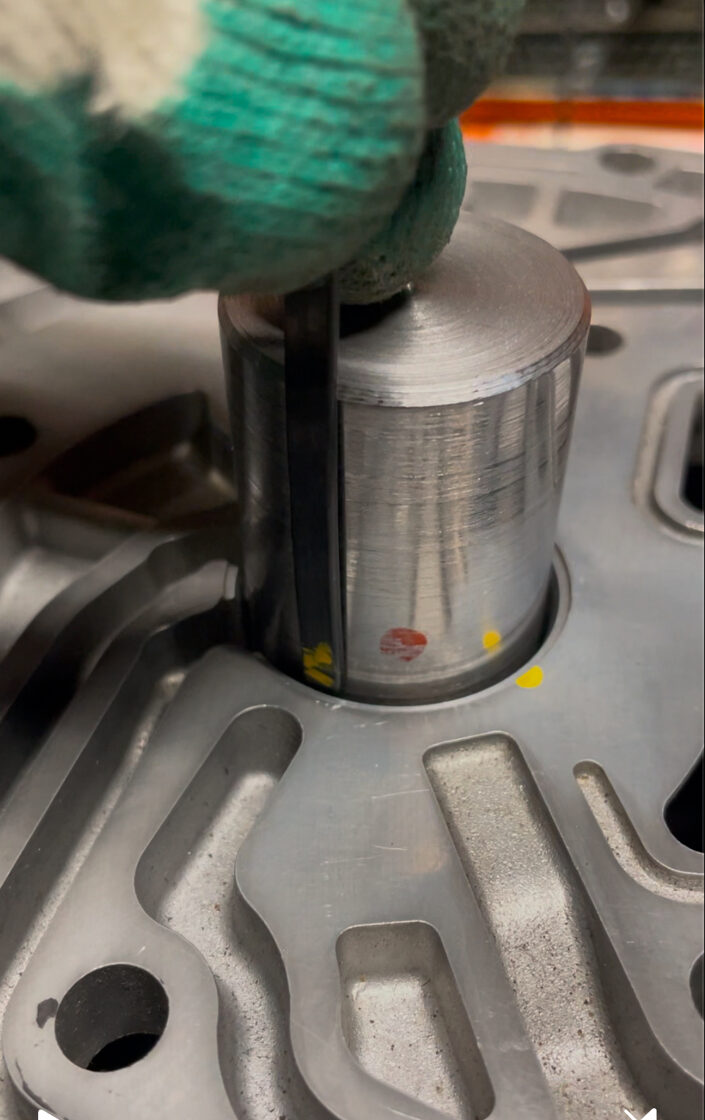
To this day, the adapter plates presented on the website only undergo visual quality control. When the plate is installed on an engine with dowels, a torque converter installed, and the bell housing from the 7G-Tronic transmission placed on top, it’s clear that the torque converter hub aligns with the center of the oil pump hole. This alignment is visible from the uniform edge of the visible part of the hub.
However, there’s one more thing to keep in mind: the torque converter is attached to a flexible flywheel, and during engine rotation, under the influence of centrifugal force, it naturally aligns itself!
For more precise quality control, a special shaft was ordered and is currently being manufactured. With this shaft, misalignment can be measured down to 0.01mm.
It’s also important to account for measurement inaccuracies — they’re always present! Even with a declared tolerance of 0.01mm, the actual manufacturing tolerance can be 0.03mm, which means the final dimension of the part could differ by up to 0.27mm. Temperature plays a significant role here as well. The temperature during measurement, manufacturing, and installation all affect the result.
Finally, the special shaft is ready. I tested the plates. The latest version of the plates for the OM648 and OM647 engines, upon visual inspection, was well-made.
First, I checked the crankshaft runout. Using an indicator, the maximum deviation was about half the scale, so let’s consider it as 0.005mm (tolerance 0.03mm). Then, I installed the special (calibration) shaft onto the engine shaft. I mounted the bell housing from the 7G-Tronic transmission and checked the shaft runout. It was 0.01mm, which matched the manufacturer’s declared runout tolerance. The gap between the shaft and the bell housing hole was uniform, and the plastic feeler gauge went in to the same depth all around. But we need numbers. In engineering, it’s all about the numbers when it comes to quality!
Unfortunately, this indicator couldn’t measure the misalignment of the shaft relative to the bell housing due to its design limitations and size. So, I ordered another tool that would allow me to measure it accurately.
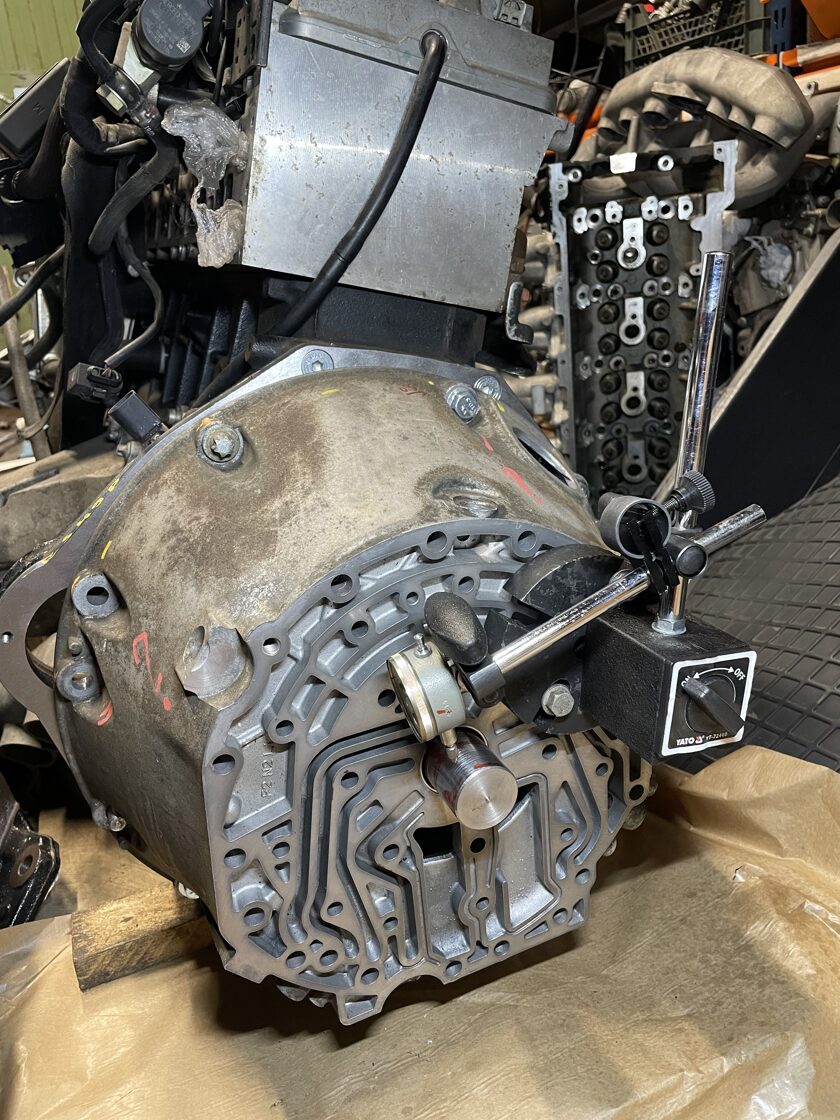
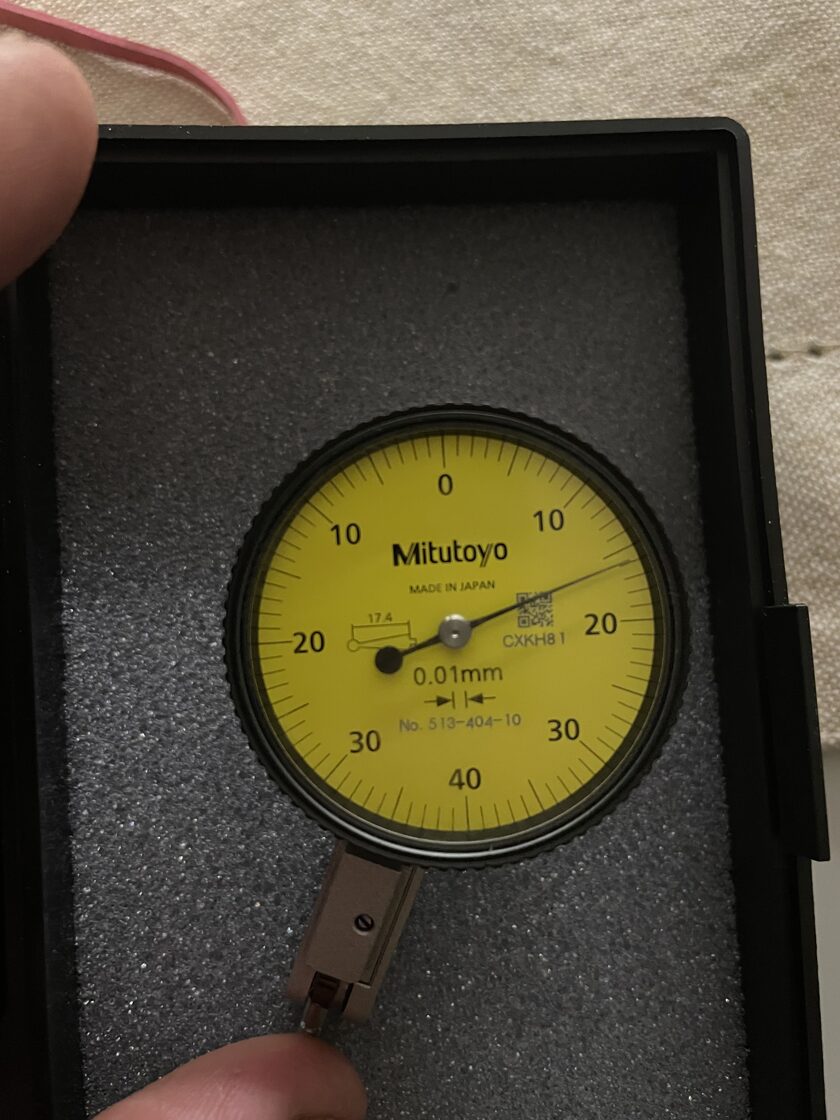
Finally, the long-awaited tool from Mitutoyo (a high-end brand in the field of measuring instruments) arrived. The tool's resolution is 0.01mm. To put this into perspective, divide 1 millimeter by 100. The maximum deviation this tool can measure is 0.8mm. That's less than a millimeter!
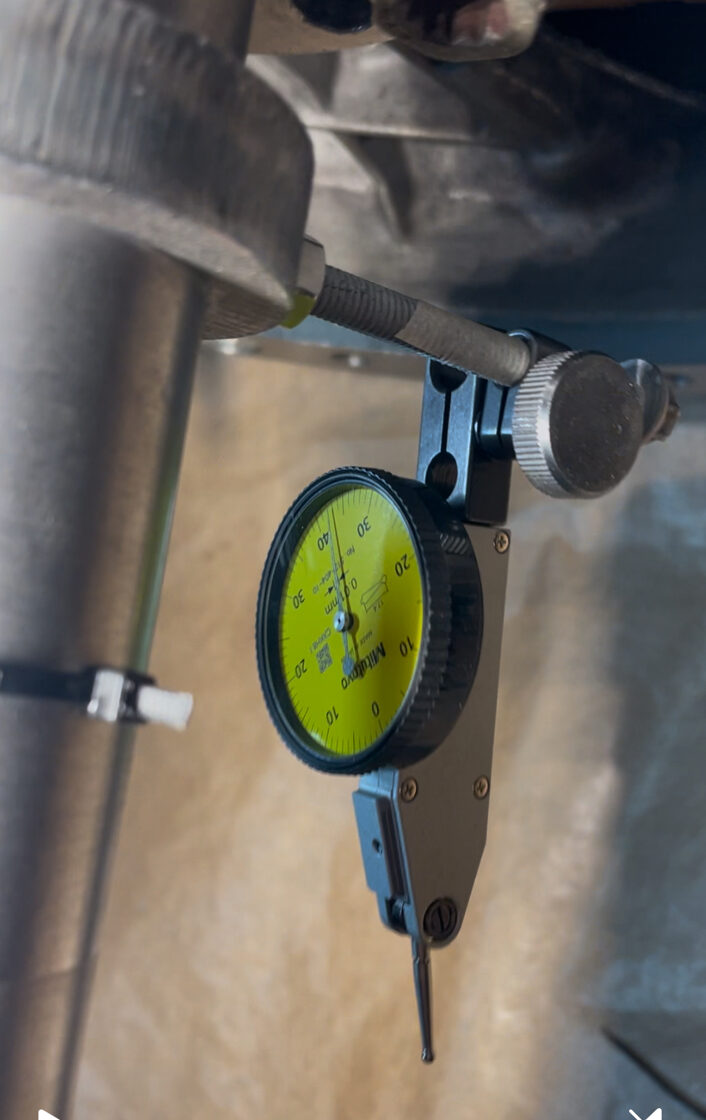
To secure the tool to the shaft, a special bracket was designed and manufactured. This bracket fits onto the shaft, and the indicator attachment is mounted to it.
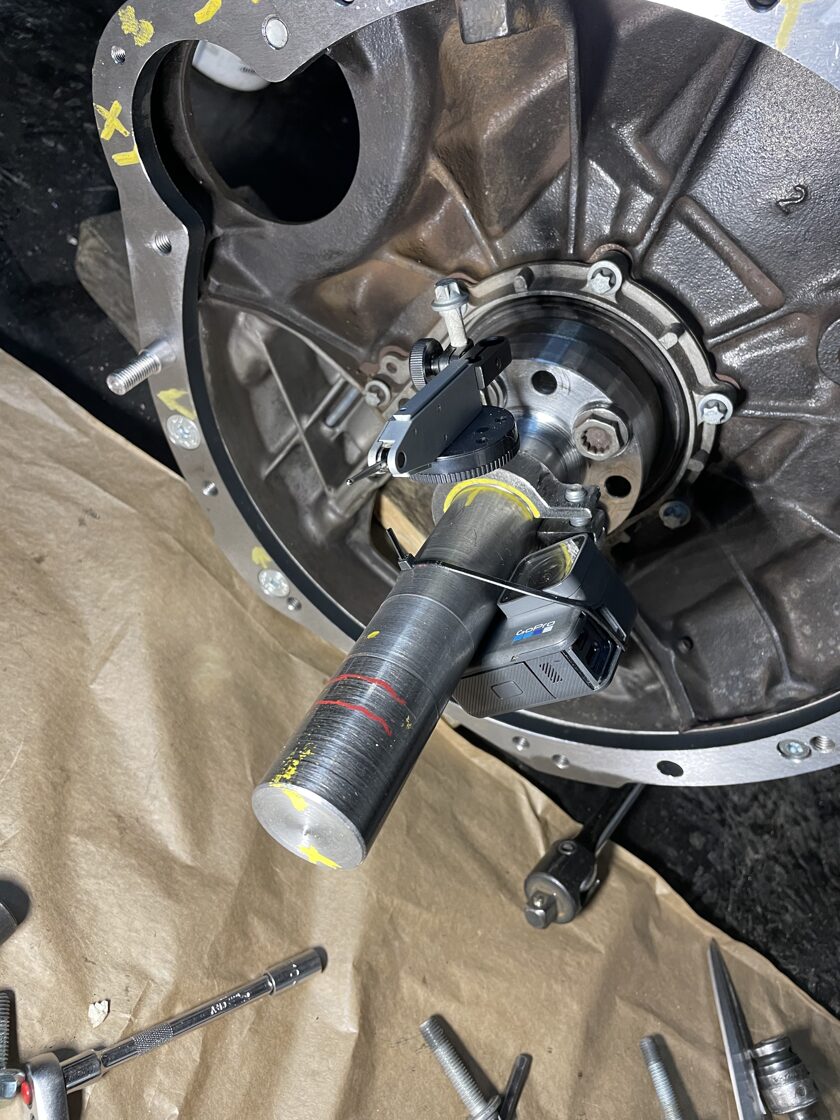
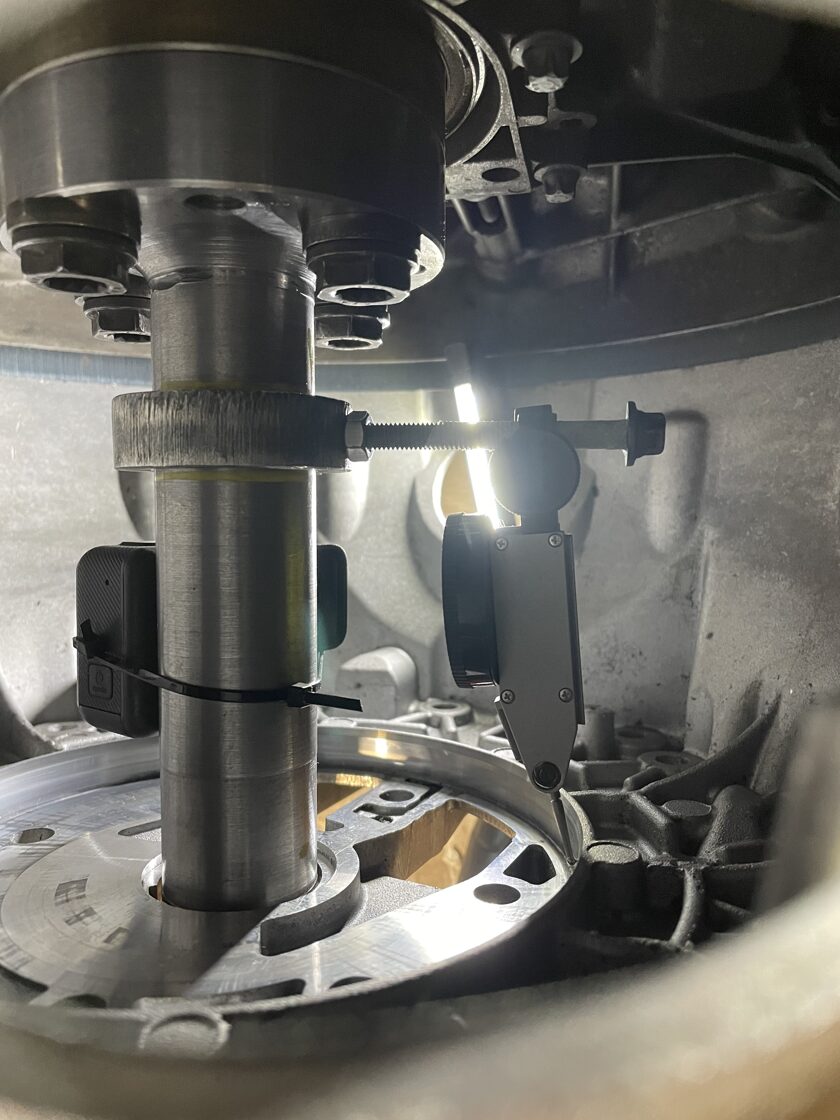
 Next, to see the values displayed by the indicator in real-time, a GoPro camera was mounted on the shaft. The camera connected to the phone via Wi-Fi, and through the "Live Preview" function, I could monitor the indicator’s readings while rotating the engine. Here’s what it looked like when everything was assembled:
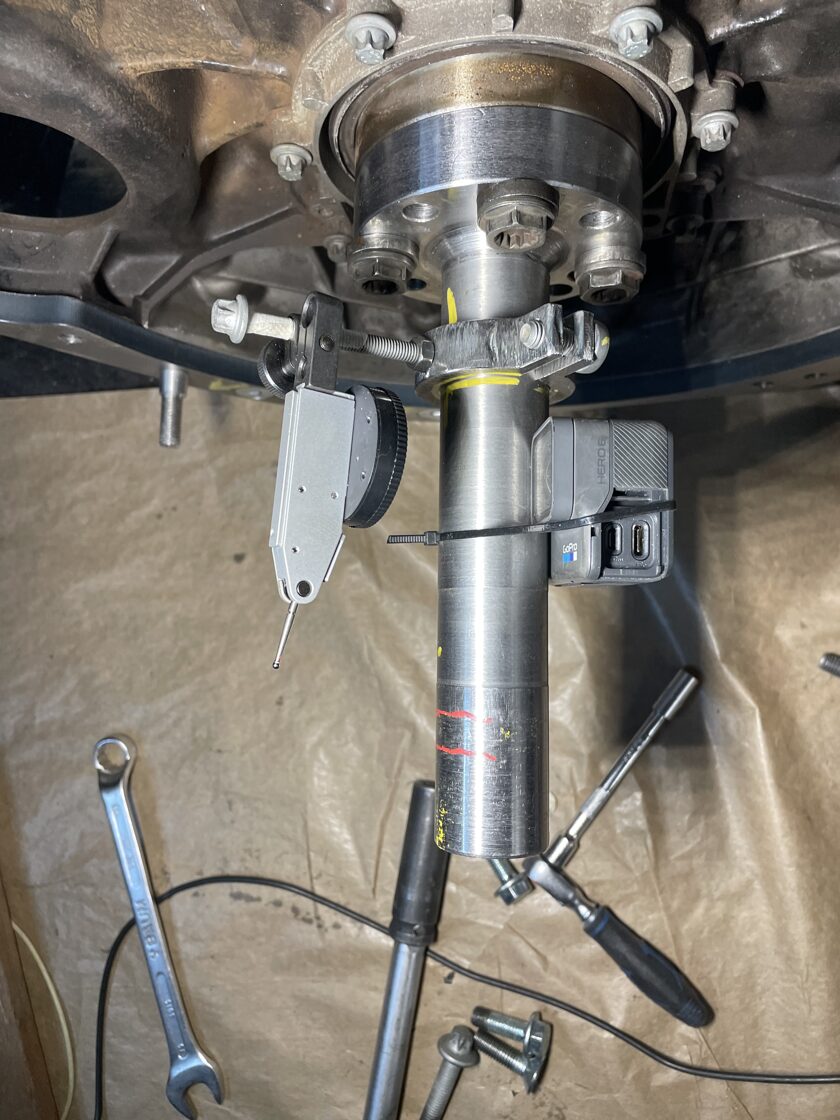
We clean all mating surfaces, insert the dowels into the engine, mount the adapter plate, and bolt it in place. First, we check the shaft runout. The declared runout is 0.01mm, and during the check, we got the same value. This means the mounting surfaces have been cleaned properly.
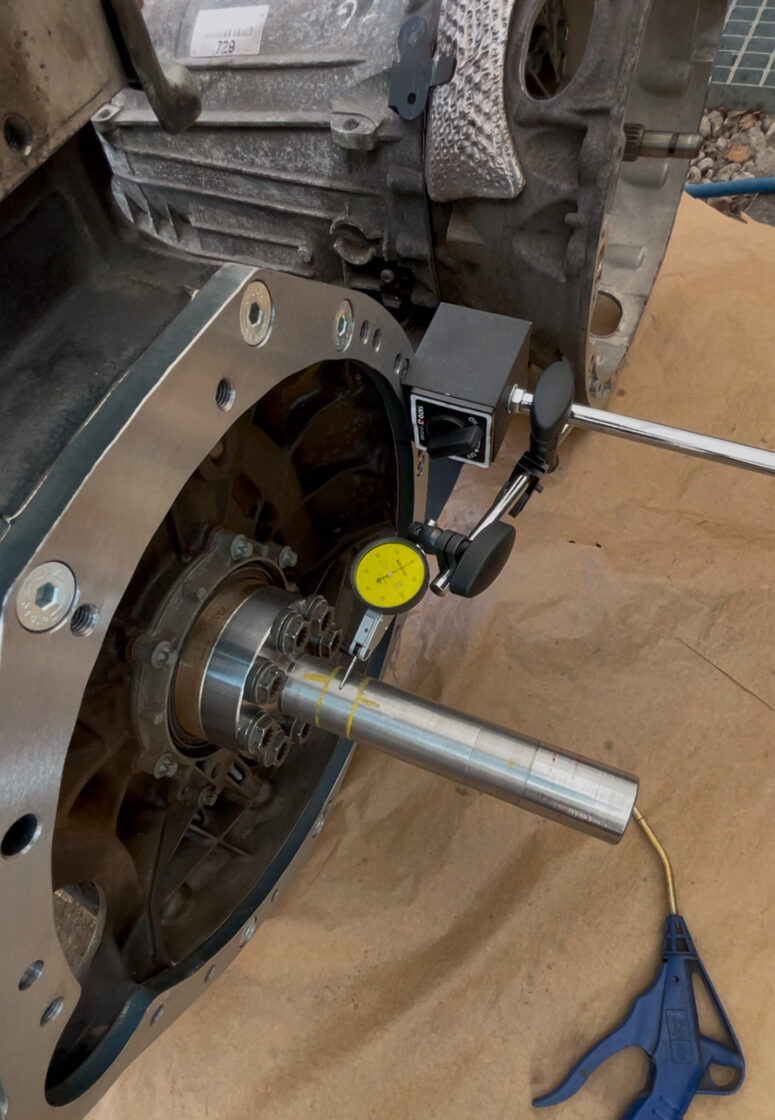
Next, we screw in the dowels for the transmission and install the bell housing from the 7G-Tronic transmission onto them. Here’s what it looks like. The indicator gauge moves along the machined hole of the transmission oil pump.
Then, we connect to the camera and, while rotating the engine (clockwise, of course), we monitor the deviation of the indicator needle. During the engine rotation, the needle moves. Since it’s very difficult to set the indicator precisely to zero when mounting the bell housing, after tightening the housing, the needle may be positioned anywhere. So, the measurement doesn’t start from zero!
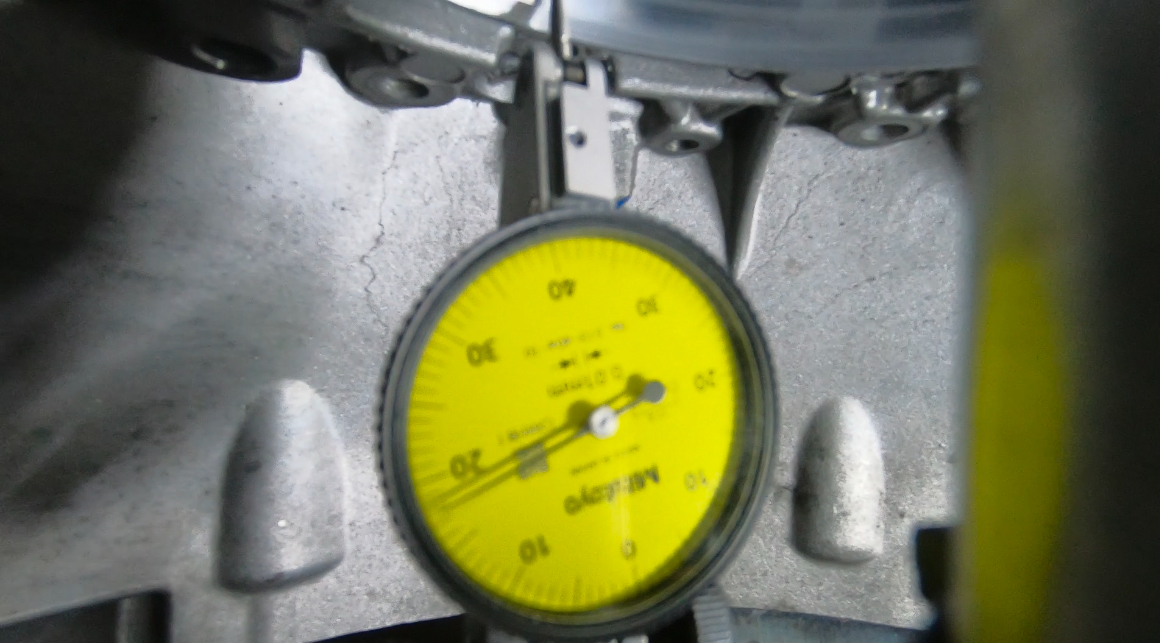
While rotating, we consider the deviation as the difference between the minimum and maximum deviation.
So, after measuring 10 adapter plates for the OM648 3.2 CDI engine, we spent nearly 4 hours and obtained the following values:
0.12, 0.17, 0.21, 0.07, 0.55 (defect), 0.13, 0.15, 0.11, 0.05, 0.10 mm.
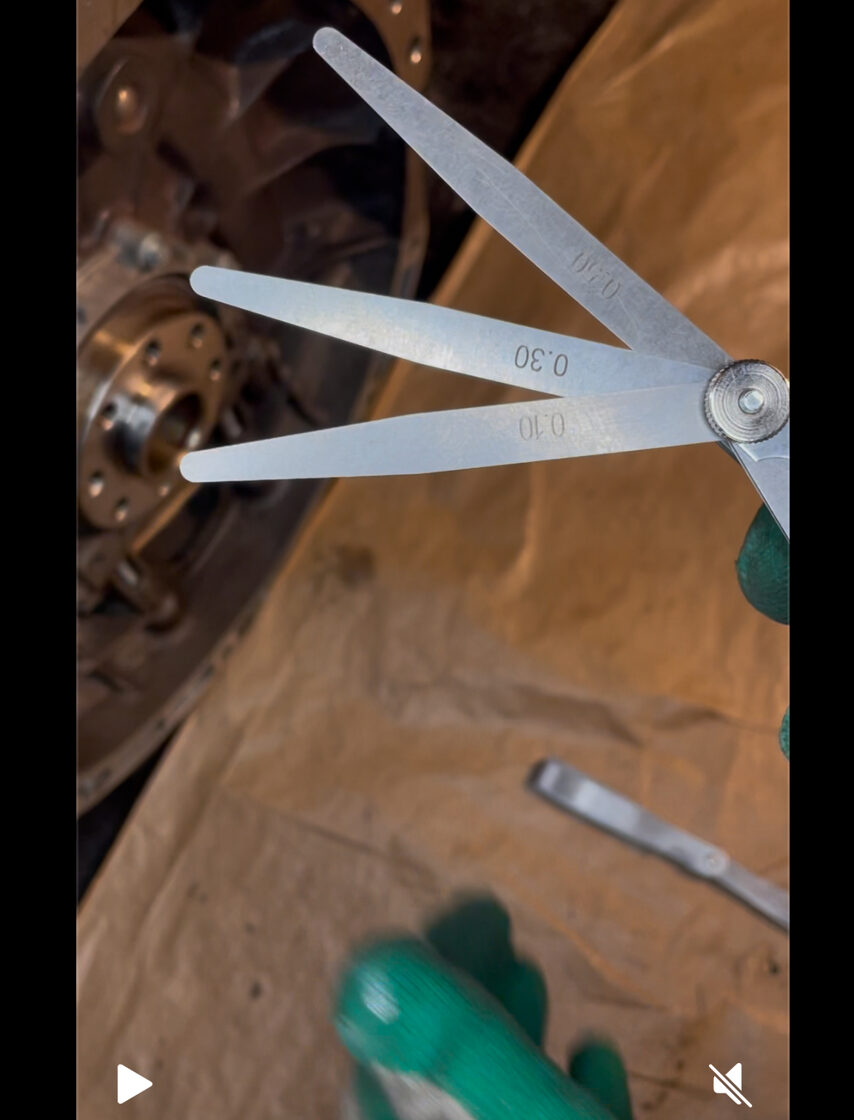
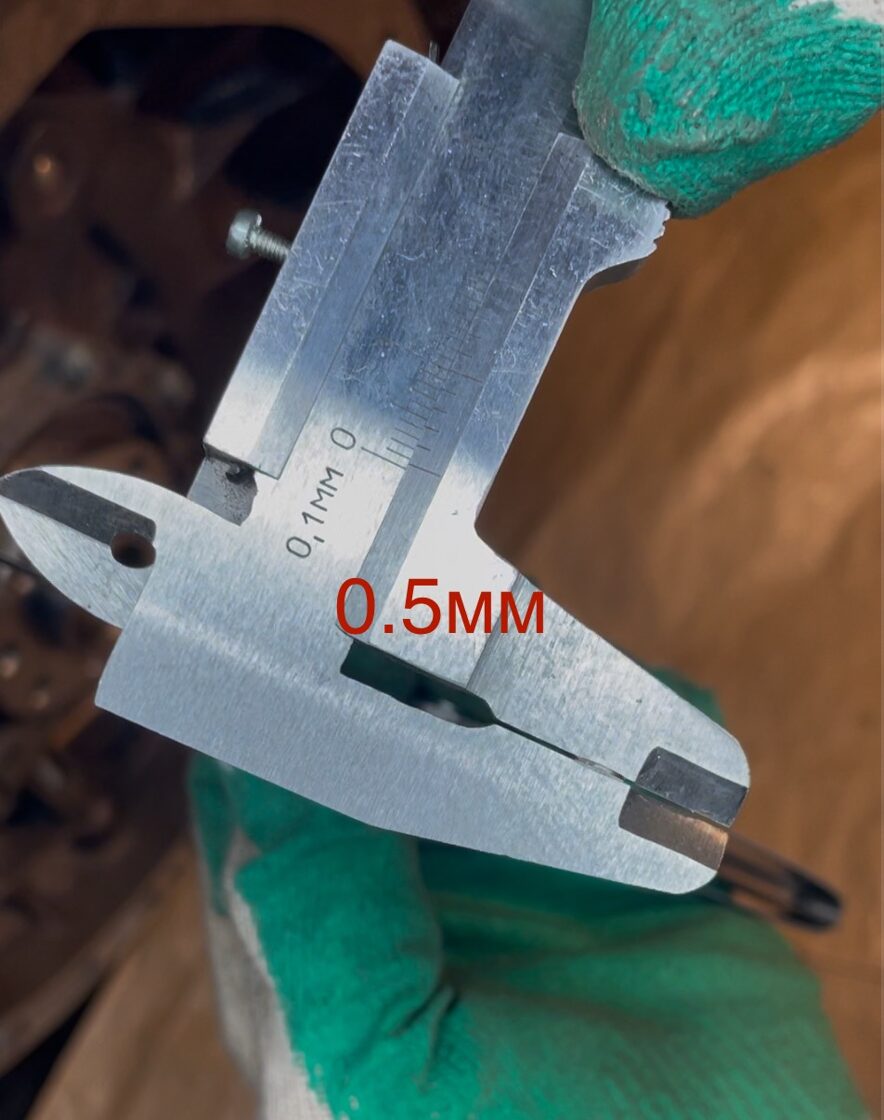
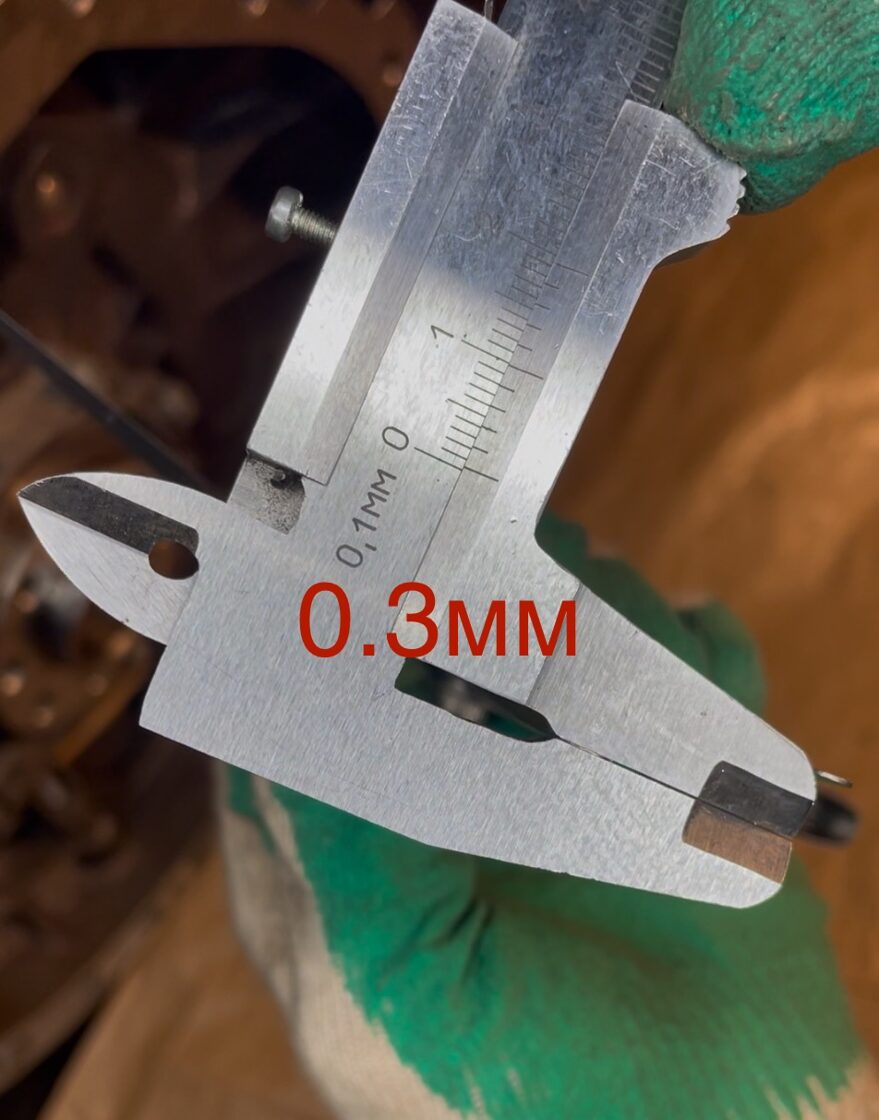
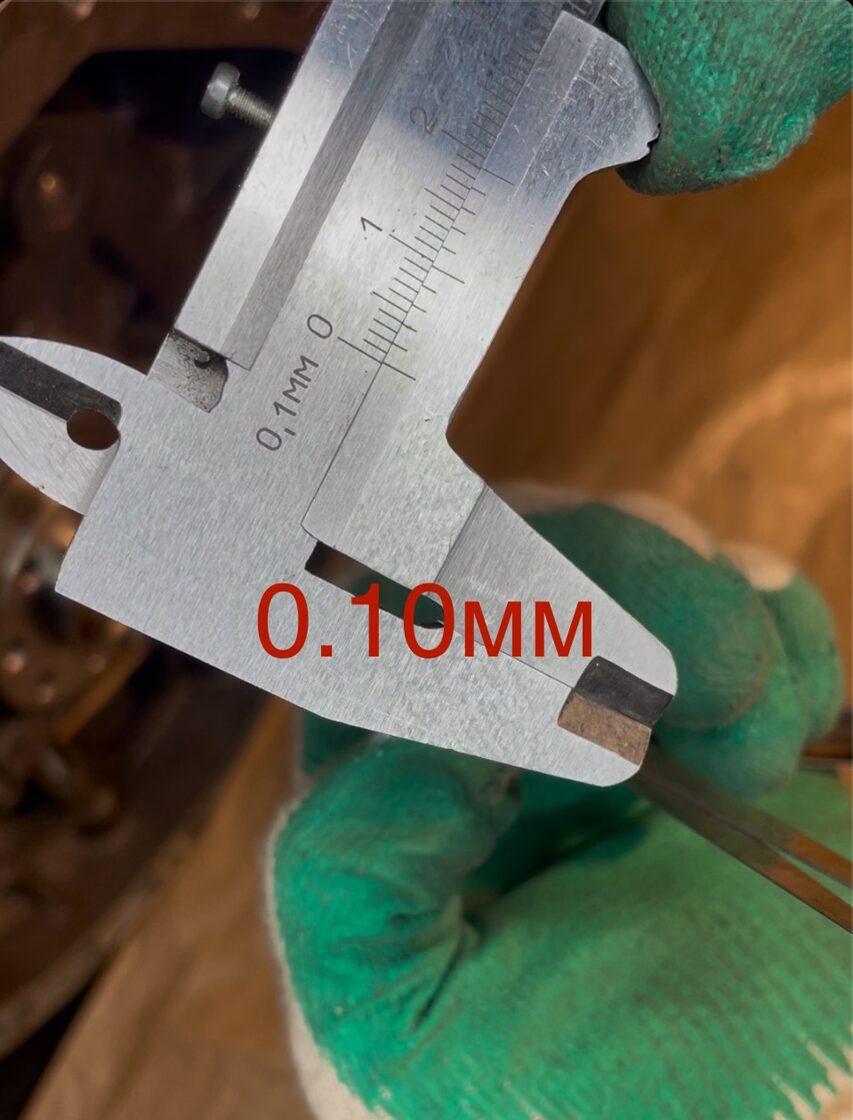
To make it clearer what we’re talking about, I bought feeler gauges and took a photo of their thickness. 0.1mm is the thickness of a standard A4 printer paper sheet.
Here’s how 0.5mm, 0.3mm, and 0.1mm look:
This is a very good result! Of course, there is one defective adapter plate with a deviation of 0.55mm. I checked the alignment of the transmission bell housing with the 722.626 transmission from the W220 320 CDI on the OM648 engine. I obtained a deviation of 0.17mm, while on the OM613 engine, from which this transmission was originally removed, the deviation was 0.23mm.
When I seriously approached the task of manufacturing the adapter plate for the OM648 engine, after the first measurements on special equipment, I realized that the OM648 and OM613 engines are different. It’s a small difference, but there’s a 0.136mm variation in critical dimensions. In practice, this causes a misalignment from the center. It’s possibly related to an update in the production line or changes in equipment. But the fact is that the dimensions of the mounting and fastening holes in the OM648 and OM613 engines differ, and I can demonstrate this with numbers.
I went a bit further and started looking into how the sequence of tightening the transmission bolts affects the alignment deviation of the engine and transmission shafts. The first and second bolts play a crucial role! You need to know the order in which to tighten the first and second bolts. In the worst-case scenario, the difference in alignment on the same adapter plate ranged from 0.07mm in the best case to 0.22mm in the worst case. That’s a 0.15mm difference. Imagine you have an adapter plate with a 0.2mm deviation. Add 0.15mm, and you already have 0.35mm of misalignment — that’s beyond the tolerance!
I have achieved a very high level of production for the adapter plates.
Thank you very much for reading this.
